Hazelcast and Cloud Foundry
With growing requirements of moving away from maintaining expensive infrastructure and dedicated IT farms to run software, the focus is now shifting towards leveraging cloud capabilities to provide agile, robust and mobile IT ecosystems. Cloud technologies provide great tools to build efficient and EAA (Everywhere and Always Available) systems that facilitate the evolution of PaaS (Platform-as-a-Service) technologies. We at Hazelcast understand the importance of being at the core of this evolution and for that reason we decided to enhance our efforts to be the leaders of distributed systems in PaaS universe too. With Hazelcast v3.6 in 2016, Hazelcast will bring about native integrations with Pivotal Cloud Foundry and OpenShift – the two major players of PaaS systems. In this post, we will go over the details of Hazelcast integration with Cloud Foundry and will learn about different methods of deployment.

Cloud Foundry Cloud Foundry is an industry standard cloud platform from Pivotal that lets anyone deploy applications or services on preferred choice of cloud environment and make them available to use. A deployed service or an application can easily scale out to handle increasing demand by the platform. CF balances its processing load over multiple machines, optimizing for efficiency and resilience against point failure. One of the key components to accomplish this is BOSH.
What is BOSH?
The BOSH system (or BOSH Director) creates and deploys virtual machines on top of a physical computing infrastructure (dedicated physical machines or cloud VMs) and deploys and runs Cloud Foundry on top of this cloud. To configure the deployment, it follows a manifest document.
Integration with Cloud Foundry
We have already learned that PCF is the major player in PaaS technologies and allows provisioning of software on its platform to run as service. In order to ensure smooth deployment of Hazelcast cluster on Cloud Foundry, few bits and pieces were required to be put together and devise a formulated approach for deployment. Before we get into nuts and bolts of this integration, let’s first get ourselves familiarize with some of the important terminologies that I’ll be using frequently in this post:
| Cloud Controller | Runs applications and other processes on the cloud’s VMs, balancing demand and managing app lifecycles. |
| Service Broker | An API that publishes to Cloud Controller the ability to list service offerings, provision the services and provides means for applications to detect and make calls out to it. |
| Service Instant | A service that gets created on create-service request from a user. Service Broker asks BOSH to provision VM for a Service Instance. BOSH may provide a common VM or dedicated VMs for each service instance, based on its configuration. |
| Droplet | A droplet is an archive within Cloud Foundry that contains the application ready to run on a DEA. A droplet is the result of the application staging process. |
| Buildpack | Contains libraries, services, etc. that an app uses. Before sending an app to the VM, the Cloud Controller stages it for delivery by combining stack, Buildpack and source code into a droplet that the VM can unpack, compile and run. |
Infrastructure
Cloud Foundry can be deployed in a privately hosted environment (physical or VMs) or in cloud (AWS, OpenStack, etc.). We will be using EC2 to host the CF deployment, so you will need an account at AWS and all the required EC2 credentials.
Prerequisites
You will be firing BOSH and CF commands for their respective deployments – BOSH Director and Cloud Foundry; you can use your local laptop or a VM or an EC2 instance for this and we are going to call it your Command Center. Apart from JDK, you will need the following installed on your command center:
- Ruby v2.0 or higher
- GEM v2.5 or higher
- Hazelcast v3.6Also, even though I earlier tried explaining some of the important components of Cloud Foundry, this post expects the user to have clear understanding of Cloud Foundry principles and its components.
Preparations
You are now equipped with everything you need to start your first ever deployment of Hazelcast on Cloud Foundry, so let’s roll.
Deploy
BOSH and Cloud Foundry First things first, download and install BOSH cli v1.5 or higher, on your command center. Run the following: gem install bosh_cli -v "~> 1.5.0.pre" --source https://s3.amazonaws.com/bosh-jenkins-gems/
To verify successful installation: 
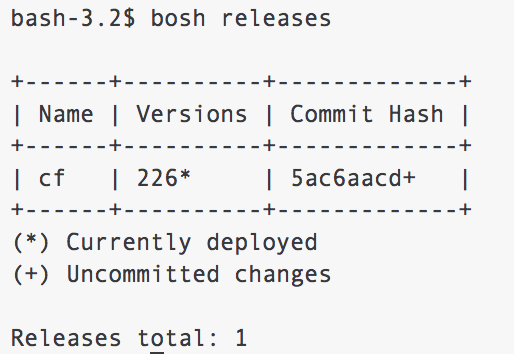
Next step –> deploy BOSH Director on EC2 and upload a Cloud Foundry release to deploy CF. Follow the instructions at http://bosh.io/docs/init-aws.html. Note: When deploying Cloud Foundry, use cf-226.yml or higher. Using an older version may result in ambiguous behavior. Deploying Cloud Foundry requires BOSH Director to launch a bunch of VMs. A successful deployment can be verified by querying BOSH Director for Cloud Foundry VMs and the status of the release you uploaded earlier:
For a successful BOSH upload of CF release: 
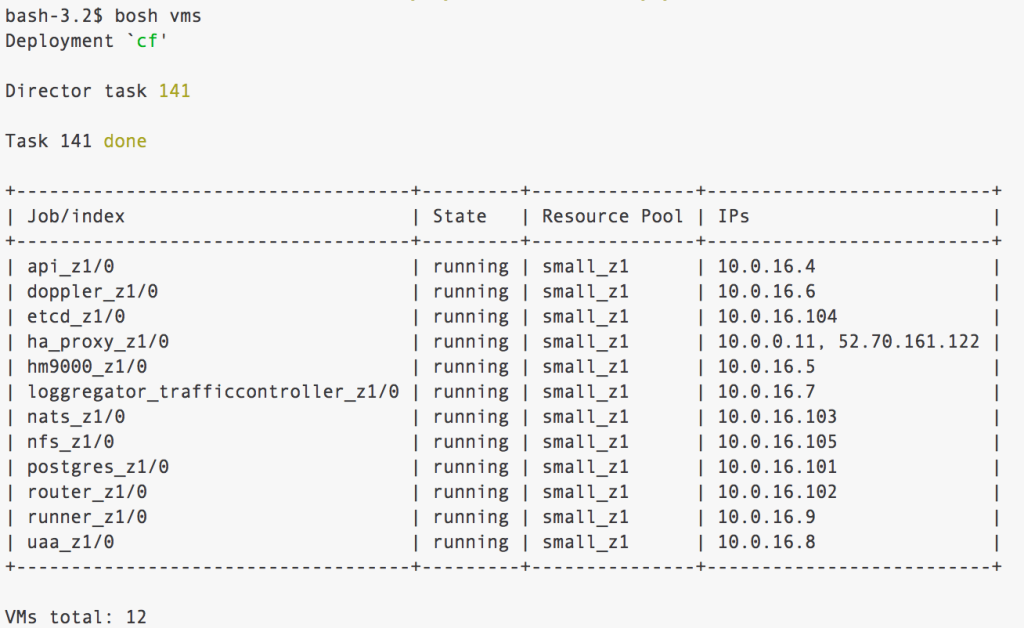
A successful BOSH deployment will show the following output: 
Here is how all BOSH VMs look like: 
Install Cloud Foundry cli
Download and install Cloud Foundry cli v6.1 or higher on your command center. Use the following link: https://network.pivotal.io/products/hazelcast
A successful installation will have the following output: 
Rock ‘n’ Roll
If you have reached this far, you have handled the trickiest part already. Now only easy bits left – you are now ready for your first ever experience of Hazelcast on Cloud Foundry.
Hazelcast as User Provided Service
Let’s start with deploying Hazelcast as an unmanaged or User Provided Service:
1. Start Hazelcast cluster of 2 or more members and ensure public access to these instances. I used EC2 to host my Hazelcast instances and opened all TCP, SSH and ICMP for public access.
2. On your command center, type the following to register Hazelcast cluster as a Service on Cloud Foundry: ![]() This requires you to enter the hostname and port of Hazelcast cluster. Pick any server instance and enter the details, Hazelcast will facilitate further connections automatically.
This requires you to enter the hostname and port of Hazelcast cluster. Pick any server instance and enter the details, Hazelcast will facilitate further connections automatically.  Full command for creating a user managed service that allows additional configuration is:
 cf cups SERVICE_INSTANCE -pMore details on user provided service: https://docs.cloudfoundry.org/devguide/services/user-provided.html
'{"username":"admin","password":"pa55woRD"}
3. Push a simple Java application that reads Cloud Foundry’s system variable VCAP_SERVICES to extract service credentials. VCAP_SERVICES will not return anything until the application is bound to the service.CloudFoundryClient is sample app, take a look.
4. Bind your application with hazelcast-unmanaged-svc: 
5. Restage the application on CF: ![]()
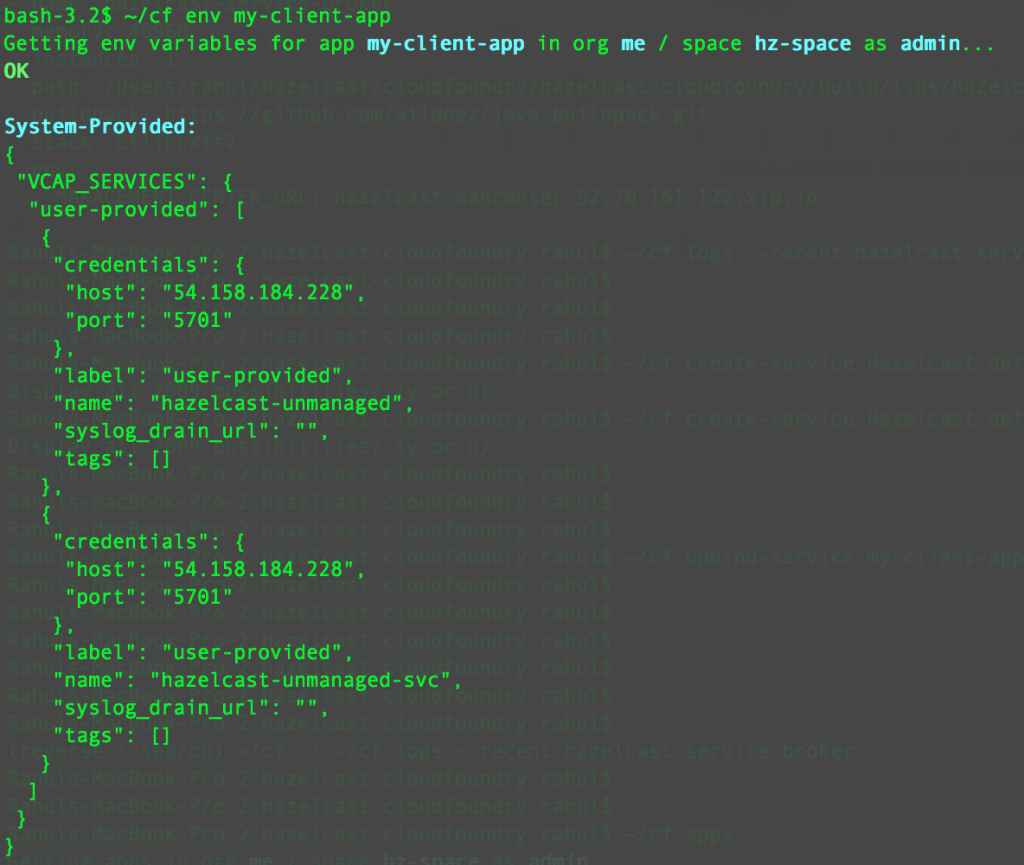
6. At this point, VCAP_SERVICES will return the credentials that you earlier configured at the time of creating service. Execute the following command to check the environment variable of your application will return VCAP_SERVICES: 
7. Parse the value of VCAP_SERVICES using a json parser, retrieve the host and port, and initiate connection with Hazelcast member through Hazelcast client APIs. Check out this link for an example: https://github.com/wildnez/cloudfoundry/blob/master/src/main/java/com/hazelcast/cloudfoundry/samples/CloudFoundryClient.java
Hazelcast as a Cloud Foundry Service
To run Hazelcast as a managed Cloud Foundry service that is provisioned and maintained by the platform itself, you require a Service Broker. Those who are new to Cloud Foundry and not very familiar with Service Broker, take a look at CF documentation:http://docs.cloudfoundry.org/services/overview.html
For CF’s documentation on Custom Services and deployment, you can visit: https://docs.cloudfoundry.org/services/managing-service-brokers.html
A Service Broker implementation for Hazelcast can be found at: https://network.pivotal.io/products/hazelcast
Here are step-by-step instructions to deploy and use Hazelcast Service Broker:
1. Clone the repo somewhere local where you have your command center setup.
2. It’s a Gradle project; build using ./gradlew clean build. This will create ./build/libs/hazelcast-cf-service-broker.war.
3. Update the manifest.yml with fully qualified path to the war file.
4. You are now ready to push Service Broker into CF. Since service broker also receives incoming requests, you need to let CF create routing for the service broker app. So we will not be using –no-route in this case. Just a simple ~/cf push.
A successful push would show the service broker running as one of the CF apps: 
When a Service Broker is pushed into CF, default user credentials are created. Default username is user For password, run the following command:
**~/cf logs --recent **
Look for the following log:
**OUT Using default security password: xxxxx-xxxxxxxx-xxxxxxx**
Note this password down somewhere you can remember. Validate the deployment by running following command using password you just retrieved above:
***curl user:@hazelcast-service-broker.52.70.161.122.xip.io/v2/catalog**
5. Next step is to create a Service Broker. Run the following command using same credentials retrieved above:
***~/cf create-service-broker my-hz-broker user xxx-password-xxx http://hazelcast-service-broker.52.70.161.122.xip.io**
Just to make sure that you did it right: 
6. Run ~/cf marketplace and it will not show your service broker yet. That is because the service plan must be enabled to accommodate public consumption. Make your service plan public by doing the following: ~/cf service-access ~/cf enable-service-access Hazelcast Run ~/cf marketplace to validate.
7. We are now ready to launch services. You can create a service instance with the command: cf create-service SERVICE PLAN SERVICE_INSTANCE a. SERVICE: The service you choose from marketplace. b. PLAN: Service plans are a way for providers to offer varying levels of resources or features for the same service. c. SERVICE_INSTANCE: A name you provide for your service instance. This is an alias for the instance which is meaningful to you. Use any series of alphanumeric characters, hyphens (-), and underscores (_). You can rename the instance at any time.
Now it’s the time create a service: 
Check Service Broker’s logs for Hazelcast and you should now see a member running: 
Let’s create another service to make a real cluster: 
validating.. 
And check Service Broker’s logs again to see 2 Hazelcast members running: 
8. Push an application that reads environment variable VCAP_SERVICES for host and port. At this point of time, VCAP_SERVICES will not return anything.
9. Before you could bind an application with the service, you need to create a security group and bind both your apps and services to the group or bind the entire space.To create a security group, create a security.json file to define rules based on the following syntax:
`[{"protocol":"tcp","destination":"0.0.0.0/0","ports":"1-65535"},` `{"protocol":"udp","destination":"0.0.0.0/0","ports":"1-65535"}]`
Run
`cf create-security-group my-security-group ./security.json`
Now bind the security group to your space:
`cf bind-security-group my-security-group org-name space-name`
10. Bind the application with the service:
`cf bind-service my-client-app hz-svc-1`
11. Restage the app. VCAP_SERVICES will now return host and port as service credentials.
SUCCESS…!!!!
Use these credentials to make connection with Hazelcast members. You now have Hazelcast running as a native service on Pivotal Cloud Foundry and your applications connected. From this point onwards, normal cluster operations proceed.
Some Important Tips
- When setting CF endpoint and login, enter the username for email and password is the password configured in Cloud Foundry manifest. These can be obtained from [bosh manifest][2].
- If your application does not listen for incoming web requests then that needs to be told to Cloud Foundry by using –no-route argument. Otherwise, CF will continue to perform its health check, which is going to fail.
- System Environment variables in Cloud Foundry are in JSON format. Use Java’s JSON plugin to parse CF’s environment variables. See sample: https://github.com/wildnez/cloudfoundry/blob/master/src/main/java/com/hazelcast/cloudfoundry/samples/CloudFoundryClient.java#L22
- To configure JVM parameters for service instances, do the following: » Fork the Java Buildpack from https://github.com/cloudfoundry/java-buildpack. » Modify https://github.com/wildnez/java-buildpack/blob/master/config/open_jdk_jre.yml for heap configuration. » Check-in and push your changes. » Configure the Buildpack in manifest.yml. See [this][4] for an example.
- To create a standalone self-executing application, despite creating a self-executable jar or war, you also need to define main-class in Procfile and place it in the same directory as your manifest. See the example at https://github.com/wildnez/cloudfoundry/blob/master/Procfile.
For more information on Pivotal Cloud Foundry, visit http://docs.cloudfoundry.org/concepts/overview.html For more information on BOSH, visit http://bosh.io/docs/ For more information on Custom Services, visit http://docs.cloudfoundry.org/services/ For more information on Discovery SPI, visit http://docs.hazelcast.org/docs/3.6-RC1/manual/html-single/index.html#discovery-spi
